


Hello 👋 friends and Welcome to my blog today. I hope you are having a great day. Today, we will be introducing ourselves to a cloud hosting service.
Introduction
Linode is a popular cloud server provider with a mission to accelerate innovation by making cloud computing simple, affordable, and accessible to all since 2003, 3 years before AWS.
What is cloud hosting?
Cloud hosting is a technology that splits a physical server into multiple virtual machines called cloud servers. Then, these connect to create a single network for hosting a website. Due to its interconnected cloud structure, this type of hosting is also called cluster server hosting. Read more
What Linodes
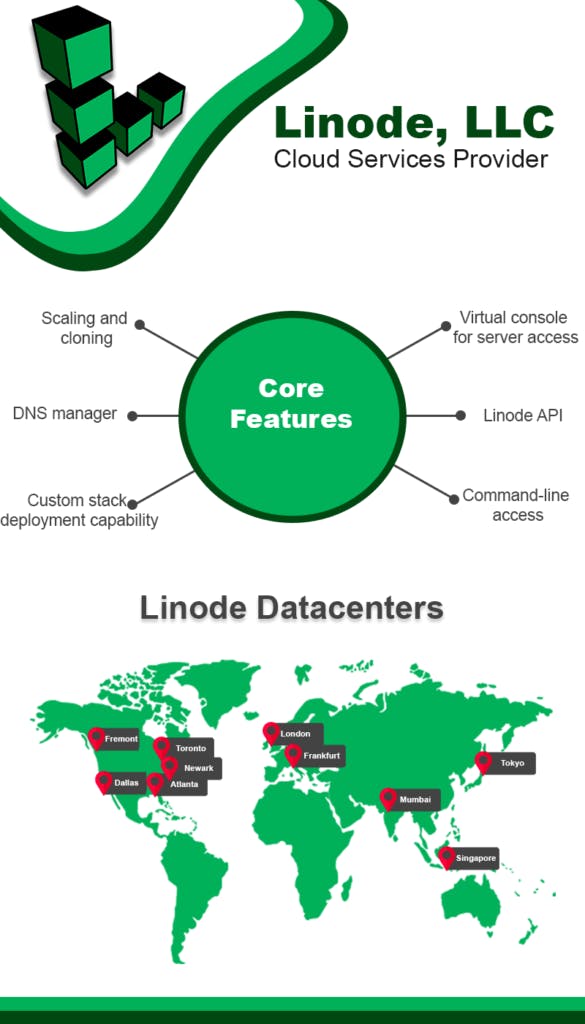
Linode is a cloud hosting platform that services over 400,000 customers, including The Onion, Creative Commons, and WP Engine. The Linode Manager allows customers to create, manage, and deploy virtual servers and services through a web interface. While the platform has thousands of new Linodes getting deployed daily, the experience from first touch to purchase and deployment to ongoing use needed some simplification and updates to help improve the overall customer journey.
Sign Up for an Account
First, you need to create a Linode account to start using our services. If you already have a Linode account, you can skip to the next section.
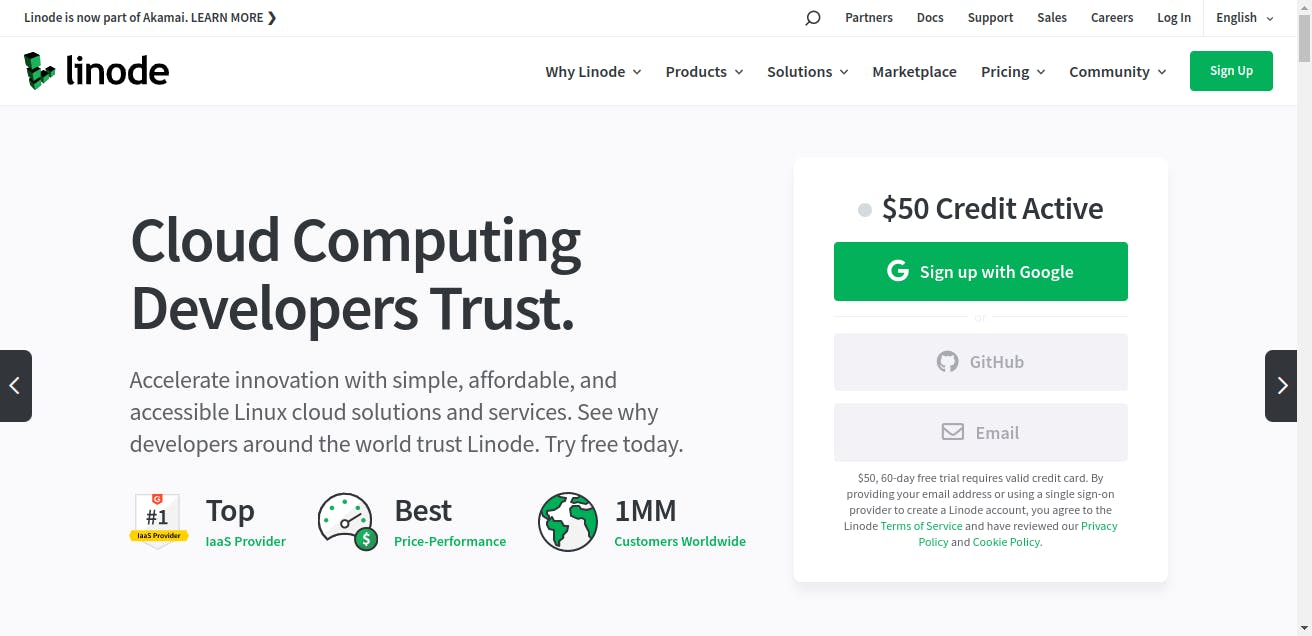
- Click the Sign Up button at the top of this page.
Note: Sign up today and receive a $100 credit. This credit will be applied to any valid services used during your first 60 days.
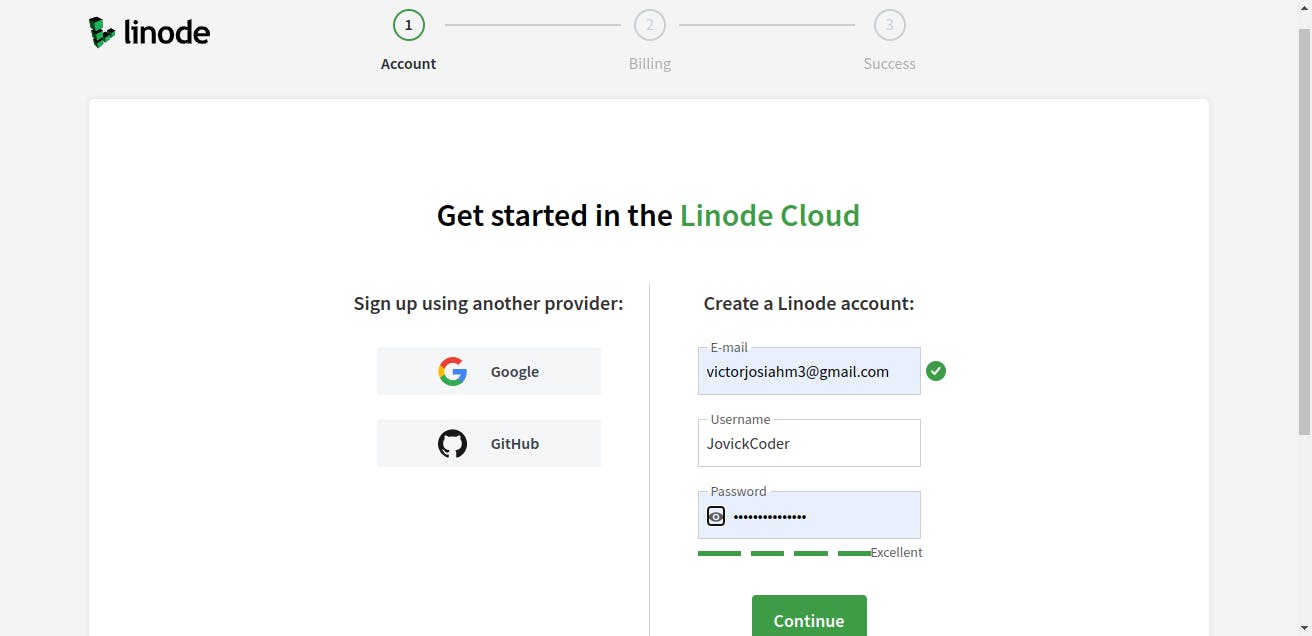
- Enter your email address, a unique username, and a strong password. Alternatively, you can sign up using your existing Google or GitHub account.
- A confirmation email will be sent to your email address. Click the link to confirm your email and be taken to the next step.
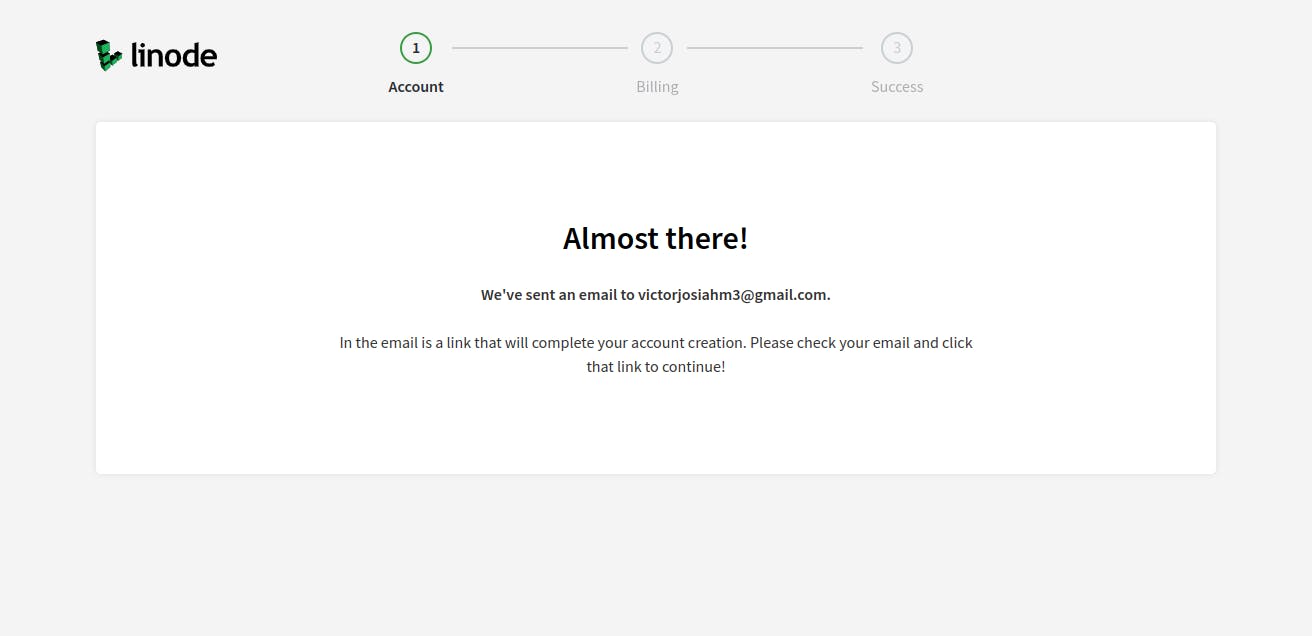
- Enter your billing and payment information. A valid credit or debit card must be used when creating an account, though additional payment methods (like Google Pay and PayPal) are available once the account is active.
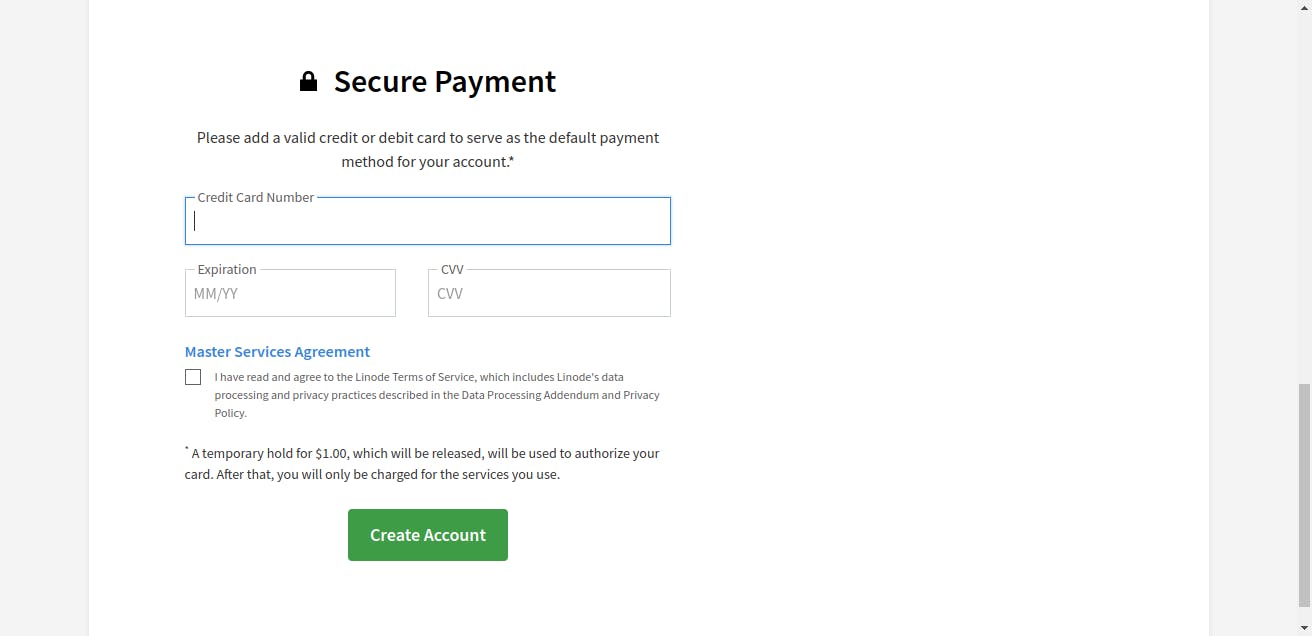
Most accounts are activated instantly, but some require manual review prior to activation.
Setup Your Linode Server using RunCloud
There are many ways to host your website using Linode. For example, you can read this Linode tutorial Host a Website on Ubuntu 18.04, which requires some basic Linux skills to do it.
Linode also provides LAMP and WordPress one-click apps to set up the server quickly.
Then why should you use RunCloud to setup your Linode server?
Why use RunCloud
- RunCloud simplifies server management experience, You don’t need to be a Linux expert to build a website powered by Linode.
- You can easily manage multiple servers (Linode and others) from one single RunCloud dashboard.
- You can manage multiple web applications (websites) in one server using RunCloud.
- You can easily clone your web application in the same server or to other servers in your RunCloud dashboard.
- RunCloud supports many web applications, including WordPress (one-click install), Laravel, and any PHP web application.
And many moreIf you still do not have a RunCloud account, please register for 5 days free trial, no credit required.
Connect Linode server to RunCloud
Connecting your Linode server to RunCloud is very easy. RunCloud provides three different methods for Linode.
- Server Provisioning using Linode API key.
- Direct Server Installation via IP Address and root password.
- Manual Server Installation via IP Address.
For the purpose of this article, we will be using the Server Provisioning
Linode Server Provisioning
RunCloud Server Provisioning feature makes it easy to set up a server in Linode directly from the RunCloud dashboard by providing an API key from Linode to RunCloud.
You only need to leave the RunCloud dashboard once to get this key and add it to RunCloud 3rd Party API Key Settings.
Within the RunCloud dashboard, for any future server creations, you will be able to add new servers without having to leave your dashboard.
Create Linode API Key
For Linode, the API key is Personal Access Token. You can create it here, Create Linode Personal Access Token
You will be taken to a screen where you can generate your token. Click the “Add a Personal Access Token” button to create your token.
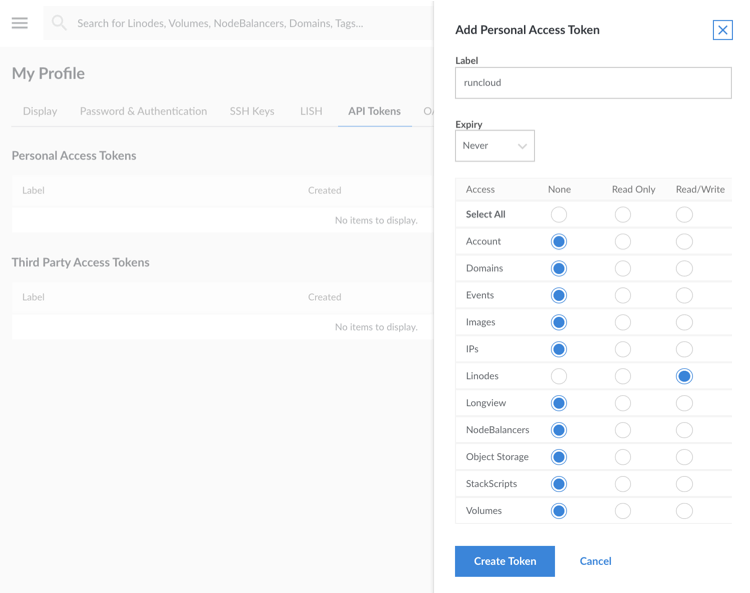
Please enable Linodes (Read/Write) scope to allow RunCloud to use this token to build your Linode server.
You can also enable Domains (Read/Write) scope if you use Domains (DNS) feature in the Linode and plan to use wildcard Let’s Encrypt SSL/TLS using Linode DNS.
Add Linode API Key to RunCloud
There are two ways to add Linode API key in RunCloud.
Method 1
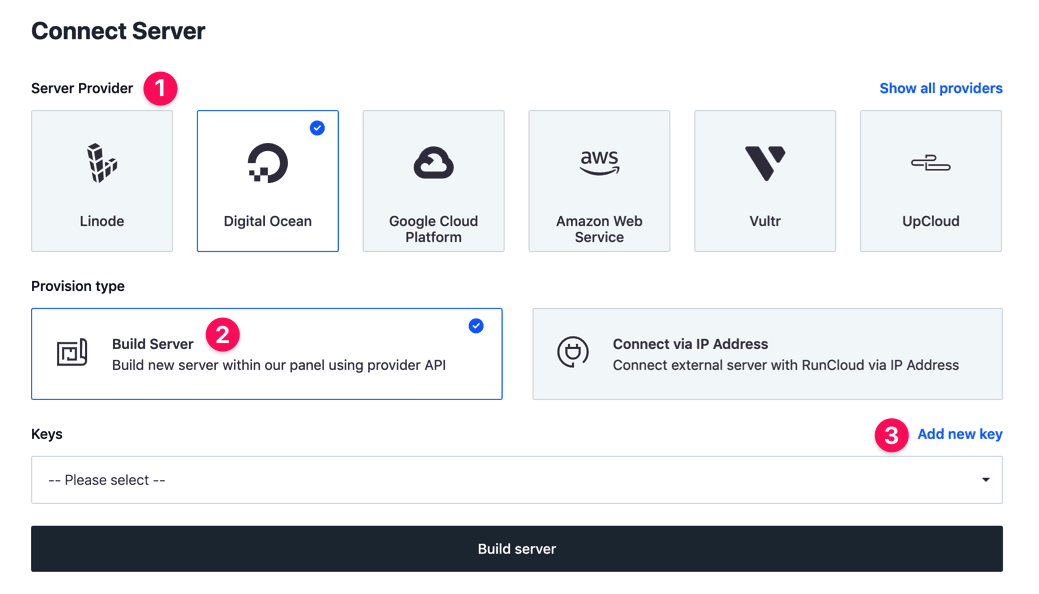
You can use “Add a new key” shortcut when you try to build a server using RunCloud and choose Linode.
Method 2
Or you can go to the “3rd Party API Key” menu by clicking your profile (top right), then click the Settings menu. You can see the list of all server provider API keys that you have added to RunCloud.
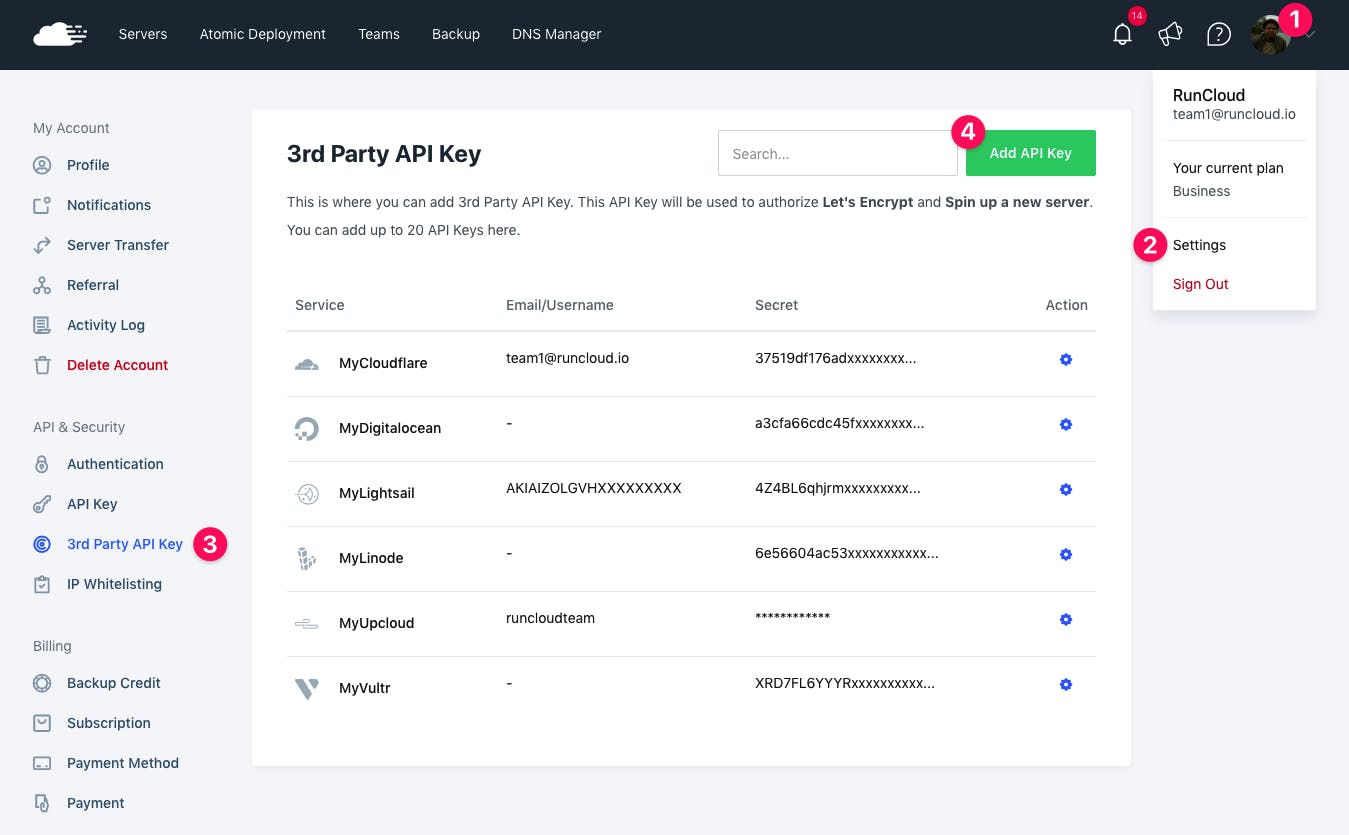
Once you have added your API key, you can start building the Linode server directly from the RunCloud dashboard.
Build Your Linode Server
To get started, click on the “Let’s get started” button to set up your first server.
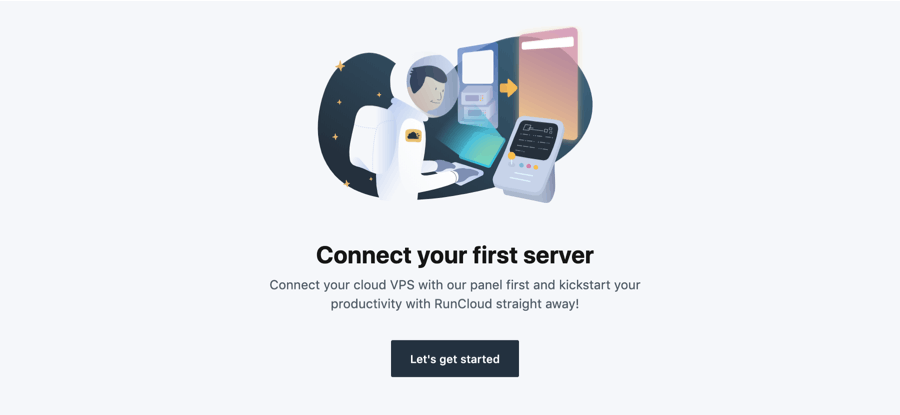 A screen will pop up showing you a list of available server providers.
Select Linode server provider, click “Build Server” provision type, and select the API key from the list.
You can build a server from all available data center regions and instances from your Linode account.
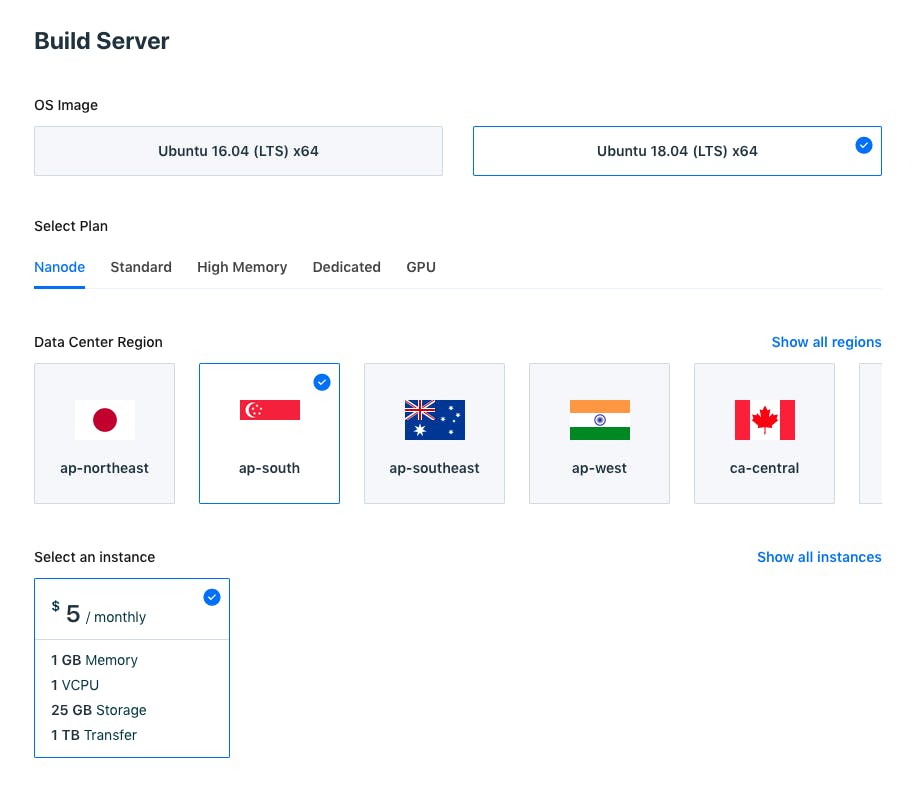
Choose OS Image, select plan, select data center region, select an instance, and click on “Add this server” to start building your server.
After clicking the “Add This Server” button, RunCloud will begin provisioning your server automatically.
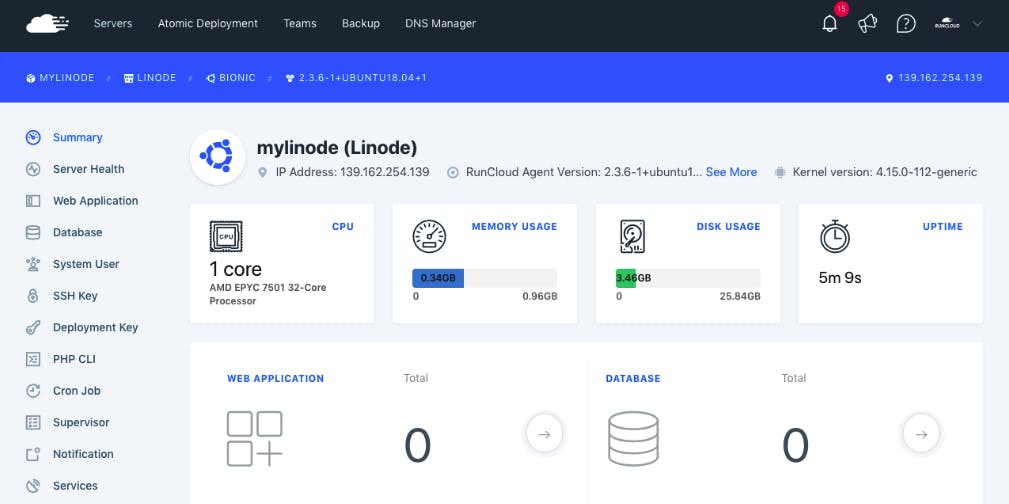
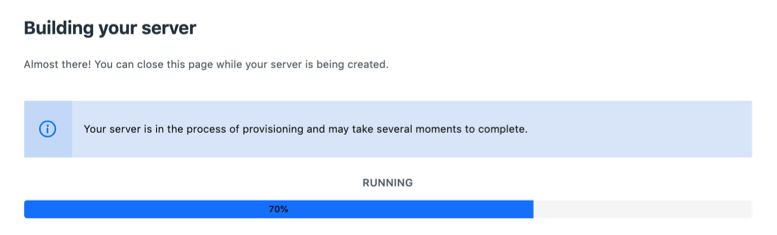 Once the provision is complete, you will land on the RunCloud dashboard.
If successful, data about your server will appear, and you have successfully set up your server with RunCloud.
Done!
Weldon, you have got this far at this point you have:
- Setup Your Linode Server using RunCloud
- Connect Linode server to RunCloud
- Create Linode API Key
- Add Linode API Key to RunCloud
- Build Your Linode Server

Our server is up and runing, let see a guide to create our first website.
Create Your First Website
With RunCloud, you don’t need to be a Linux expert to host your website with your favourite server provider. RunCloud support all PHP applications, especially WordPress, WooCommerce, and Laravel.
Creating your first “web application” is very easy. A web application is a website that can be managed from your RunCloud dashboard.
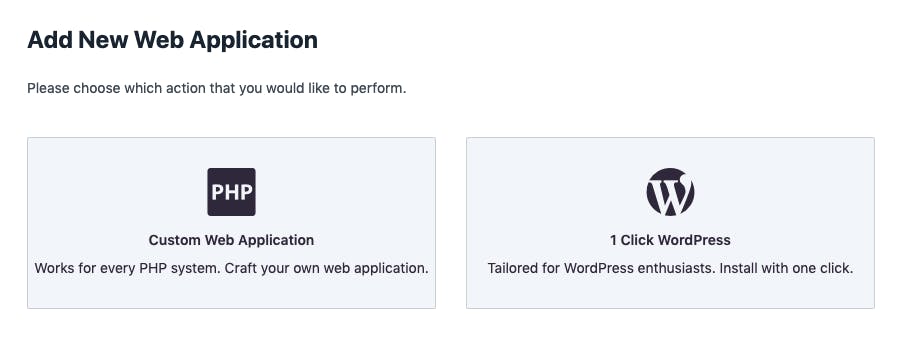 RunCloud provides two different options when creating a web application.
One-Click WordPress Install
If you want to create a WordPress or WooCommerce website, you can use RunCloud One-Click WordPress Install feature and get your WordPress web application ready in minutes.
Custom PHP Web Application
If you want to create a Laravel or custom PHP website, you can choose Custom Web Application when creating your web application.
With RunCloud, you can create multiple web applications on one server. Each web application is separate of each other sandboxed in its own with its own permissions.
Sandboxing each web application allows it to be more secure. If one of your website is compromised, the others would be completely safe.
Congratulations
 It has been a long learning process, and I hope you understand the above-mentioned subject.
Give feedback
If you enjoyed and learned something new from this article, follow me for More web simplified topics, and do well to give me feedback by using the reaction emojis. Let me know how you feel about the explanation in the comment section. Give feedback, corrections, and recommendations. Much 🥰
Let us connect
I would like to connect with any and every reader Let us connect
victorjosiah19@Twitter
josiah-victor@LinkedIn