


Hello 👋 friends and Welcome to my blog today. I hope you are having a great day. Today I will be explaining how I built a simple tip calculator.
Before we get started I wrote a simplified explanation of DOM and DOM Manipulation, check them out for a better understanding of the codes used in this article.
Introduction
I am a proud member of the WEB3.0 ENTHUSIASTS developer community. We are developers with a strong desire to become web3 developers. We have been developing our skills through community tests, hangouts, and collaborative projects in groups. Projects are submitted and defended.
The community's last project was to create a Tip calculator to access members' knowledge of DOM manipulation. Projects were submitted via Twitter using the hashtag #W3E, and our humble mentor @SaliNaik inspected and gave corrections where needed. My project turned out to be among the best simplified, so I decided to share my thought pattern with everyone who might need them, not just members of the community.
They are a lot more to learn than just a tip calculator, what you will learn here can be used in different projects and for a different purpose. Our only limitation is our creativity.
Let's get into it
Explanation
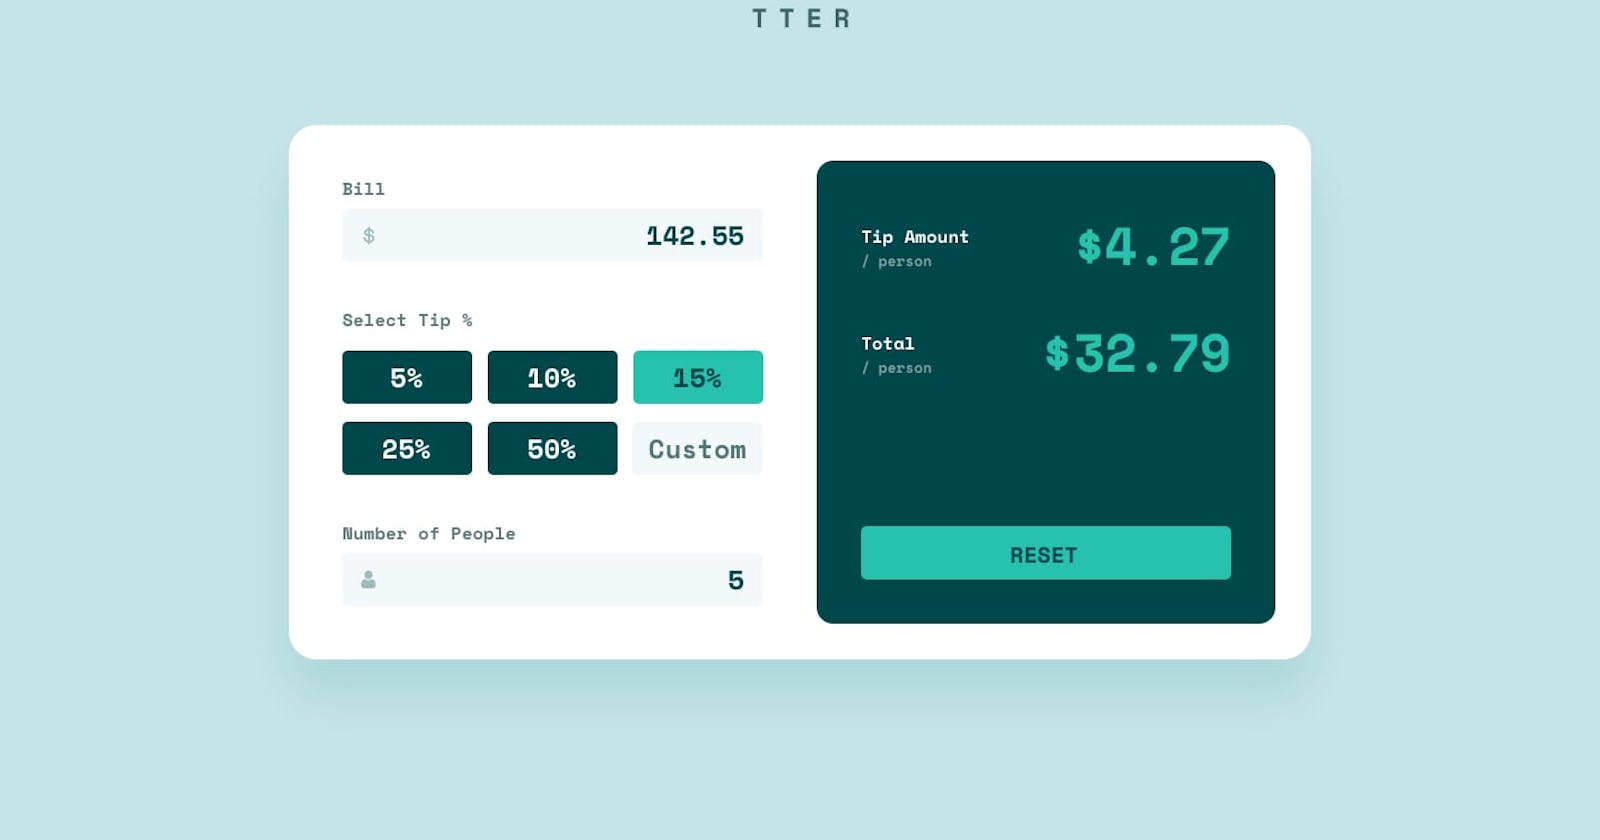
The project is divided into two sections: design and functionality. We'll walk through the design because our goal is to simplify the functionality as much as possible. Frontend Mentor provided the project files. Get More beginner-friendly Projects.
Get the project full design
Design
The project was designed using the Bootstrap CSS framework, which made the design easier and faster. The bootstrap grid provided mobile responsiveness and structure, so I was able to achieve the whole design with only a few lines of custom CSS code.
Frontend Mentor offers you a Front-end Style Guide, which includes all the instructions and guidelines (fonts, colors, layouts, and so on) you'll need to apply to make your design match the initial UI design provided for the project.
Structure
utilizing the bootstrap grade, I added bootstrap to my project, using the bootstrap CDN link.
 <link href=" HTTPS://cdn.jsdelivr.net/npm/bootstrap@5.0.2/dist/css/bootstrap.min.css" rel="stylesheet"
    integrity="sha384-EVSTQN3/azprG1Anm3QDgpJLIm9Nao0Yz1ztcQTwFspd3yD65VohhpuuCOmLASjC" crossorigin="anonymous">
The design has 2 major part which is form and result Html structure
  <div class="container">
    <div class="row">
      <div class="col-md-6 form-div">
        <!-- Form column -->
      </div>
      <div class="col-md-6 result-div">
        <!-- Result column -->
      </div>
    </div>
  </div>
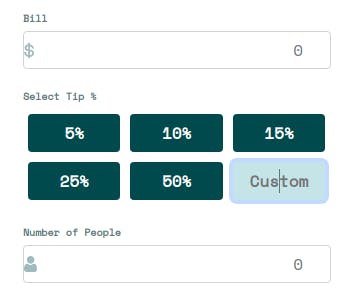
Form column
the form is having three input fields and five buttons, each is holding values to be used for the tip calculation we will be going through how we get the values of input fields and buttons.
HTML
<form action="" id="tipForm">
    <div class="bill-div">
      <div class="s-text">Bill</div>
      <input type=" number" id="bill-input" class="form-control" placeholder="0">
      <sup class="message"></sup>
    </div>

    <div class="select-tip-div">
      <div class="s-text">Select Tip %</div>
      <div class="d-flex flex-wrap">
        <button class="btn">5</button>
        <button class="btn">10</button>
        <button class="btn">15</button>
        <button class="btn">25</button>
        <button class="btn">50</button>
        <input class="btn Custom" placeholder=" Custom">
      </div>
      <sup class="message"></sup>
    </div>

    <div class="People">
      <div class="s-text">Number of People</div>
      <input type=" number" class="form-control " id="people-input" placeholder='0'>
      <sup class="message"></sup>

    </div>
  </form>
Note they are super elements with the class name message. we will use that to display error messages to the users
JavaScript
- I got the input fields by querying the document using the unique 'id' given to them.
    const billInput = document.querySelector('#bill-input')
    const peopleInput = document.querySelector('#people-input')
    // got this by the class name
    const customTip = document.querySelector('.Custom')
- getting the button's value is where I applied a little trick I learned, learning this makes my code easier, shorter and smarter.
- initially, I added the '$' sign with CSS, so it will not interrupt the functionality I will be using in JavaScript.
they are so many ways of doing this but trust me this is the simplified way of doing it, I will explain bit by bit.
I gave the buttons the same class name this is not for styling alone, it gave them a uniform identity so I will be able to pick them at once in JavaScript.
const selectTipButtons = document.querySelectorAll('.select-tip-div  button.btn')
console.log(selectTipButtons)
//outcome log=> [button.btn, button.btn, button.btn, ...]
The querySelectorAll uses the same selectors rule as CSS.
- it will target the element with the class name 'select-tip-div' as the parent element, then it will look for 'button' elements with the class name 'btn'.
- all the buttons with the class name 'btn' inside select-tip-div will be selected, and they will be returned in an array of HTML Collections Read more about HTMLCollection.
- with the outcome, we can map through all of them and make use of them individually.
    // map through all the buttons
    selectTipButtons.forEach((tipButton) => {
      // add an event listener to each of them
      tipButton.addEventListener('click', e => {
        // prevent the default action of a button in a form
        e.preventDefault()
        // remove previously selected button style
        removeStyle()
        // empty the custom tip input
        customTip.value = ""
        // add a class name to the button for styling
        e.target.className = "btn active"
        // the text on the button
        tip = e.target.innerText
      })
    });
- event listener will be added to each of the buttons
- when anyone is clicked, the style on the previously selected button will be removed
- it will empty the custom tip input field
- it will get the text content in the button of the button
note: the '$' sign is from CSS, so only the number will be gotten from the button - it will update the tip variable with the selected button text content.
Result column
After the form column receives figures and they have been calculated the results of the calculations are displayed in the result column.
HTML
  <div class="d-flex justify-content-between my-3">
    <div>
      <div class="s-text"> Tip Amount</div>
      <span class="person">/ person </span>
    </div>
    <div id="tip amount" class="amount">0.00</div>
  </div>

  <div class="d-flex justify-content-between my-3">
    <div>
      <div class="s-text">Total</div>
      <span class="person">/ person </span>
    </div>
    <div id="tipTotal" class='amount'>0.00</div>
  </div>

  <div class="button mt-auto"></div>

JavaScript
- I got the elements to display the results by querying the document using the unique 'id' given to them. Note they were super elements with the class name message. we will use that to display error messages to the users
- get all elements with the class name 'message'
const tipTotal = document.querySelector('#tipTotal')
const tipAmount = document.querySelector('#tipAmount')
//elements with class name message
 const messages = document.querySelectorAll('.message')
- The result column displays the tip amount and total. This will be calculated by the 'calculateTip()' function, the result column will be updated with the outcome else the values will be '$0.00'
- On the button in the result column, there will be a conditional rendering. The 'calculate' button, which initiates the compute function, will be rendered. We'll switch the button to reset when the calculations are finished, which will be used to reset the form values.
Calculate function
This is the function that carries out all calculations in the tip calculator. it gets the value of all the input fields and validates them making sure they are not submitted empty, displayed error messages when any submission rule is broken, calculates the tip, and displays the results in the result column.
Note they were super elements with the class name message in the form column. we will use that to display error messages to the users.
- messages[0] indicates the first messages element in the form because all element with message class is gotten and stored in an array of HTML Collection.
function calculateTip() {
// validate the inputs from the forms, making sure they are not empty
      if (billInput.value === '' || billInput.value === 0) {
        billInput.style.border = 'solid 1px red'
       // display an error message if the input is empty
        message[0].style.color = 'red'
        message[0].innerText = 'Bill cant is not 0'
        return
      }
      if (tip === '' || tip === 0) {
        billInput.style.border = 'solid 1px #ddd'
       // remove the first error message because it must be resolved before this line of code runs
        message[0].innerText = ''
        message[1].innerText = 'Tip not selected'
        message[1].style.color = 'red'

        return
      }
      if (peopleInput.value === '' || peopleInput.value === 0) {
        message[1].innerText = ''
        peopleInput.style.border = 'solid 1px red'
        message[2].style.color = 'red'
        message[2].innerText = 'Number of people cannot be 0'
        return
      }
      peopleInput.style.border = 'solid 1px #ddd'
     // convert tip to percentage
      const convert = parseFloat(tip) / 100
      // calculate tip amount
      const calculateTipAmount = billInput.value * convert / peopleInput.value
      // calculate tip total
      const calculateTipTotal = billInput.value * (1 + convert) / peopleInput.value
      // console.log(billInput, convert, peopleInput);

      // display tip amount on the result column
      tipAmount.innerText = ` ${(Math.round(calculateTipAmount * 100) / 100)}`
      // display tip total on the result column
      tipTotal.innerText = ` ${(Math.round(calculateTipTotal * 100) / 100)}`

      // render the reset button
      buttonDiv.innerHTML = `  <button class="btn w-100 " onclick='resetTip()'>
          Reset
        </button>`
    }
Reset function
After the form is been calculated and the results are displayed, the 'Calculate' button will be replaced with the 'reset' button. On click, this button triggers the function that resets the values of the tip calculator form back to the default values.
    function resetTip() {
      // remove selected button style
      removeStyle()
      // reset form valuse to default
      tip = 0
      billInput.value = ''
      peopleInput.value = ''
      tipAmount.innerText = ` 0.00`
      tipTotal.innerText = ` 0.00`
      //replace the 'reset' button with the 'calculate' button
      buttonDiv.innerHTML = `    <button class="btn w-100 " onclick='calculateTip()'>
          Calculate
        </button>`
    }
Chapter Summary
With all this in place, you are ready to build your tip calculator and many more projects using the methods you have learned here. If you noticed I ignored the styling of the tip calculator because our main aim is to simplify the functionality, and what happens behind the design. Get the project full design
Congratulations
It has been a long learning process, and I hope you understand the above-mentioned subject.
Give feedback
If you enjoyed and learned something new from this article, follow me for More web simplified topics, and do well to give me feedback by using the reaction emojis. Let me know how you feel about the explanation in the comment section. Give feedback, corrections, and recommendations.
Much 🥰
Let us connect
I would like to connect with any and every reader Let us connect victorjosiah19@Twitter josiah-victor@LinkedIn